A gap along a seam and a hole beside it can look similar from the outside. They are not the same repair. One may involve replacing broken stitches in intact cloth; the other may require supporting fabric that has torn or worn away.
Start by identifying what failed before reaching for glue, scissors or a needle. The best repair is the one the surrounding garment can support and that you are willing to wear afterward. Invisible restoration is not a realistic promise for every tear.
Quick Answer
Inspect the damage from both sides and distinguish an opened seam from torn or thinning fabric. Intact seam allowances may permit restitching; a tear can need a supporting patch or a professional assessment. Decide how visible the repair may be and whether the surrounding cloth is sound enough to hold it. Stop wearing a stressed damaged area until it is assessed, and do not assume a neat-looking repair restores the original durability.
As an Amazon Associate I earn from qualifying purchases.
First separate three kinds of damage
| What you see | What to investigate | Likely direction |
|---|---|---|
| A seam has opened but both fabric edges remain sound | Broken stitching, secure allowance and why the area was strained | A seam repair may be possible |
| A tear crosses the fabric away from a seam | Missing threads, shape of the tear and the condition beyond it | Supporting or visible mending may be needed |
| A broad thin area with holes developing | How far the weakened cloth extends | Assess reinforcement, a larger alteration or replacement |
A thick yarn or small surface irregularity is not automatically a hole. If you are unsure whether you are looking at damage or the texture of the cloth, consult the slubs, snags and pilling guide before cutting any threads. Trimming something that belongs to the weave can make the problem worse.
Lay the trousers flat in good light and inspect the wrong side as well as the outside. Notice whether the fabric has pulled away from stitching or whether only the sewing thread has broken. Take a clear photograph before working if you want to compare the original damage with the repair plan or discuss it with a professional.
Check the cloth around the gap
A repair needs a sound area to connect to. If the material immediately beyond a hole is thin, fraying or breaking under very gentle handling, stitching only at the visible edge may not create a useful result. The damaged region can be larger than the open gap suggests.
Look at neighboring seams and the corresponding area on the other leg. This is not a prediction of how long the garment will last; it is a way to decide whether the visible tear is isolated or part of wider wear. If both inner thighs are thinning, closing one small opening does not address the broader condition.
A recent tear from a specific snag can call for a different response from repeated failure at a tight seat seam. In the second case, assess fit and movement room as part of the repair. Stronger thread alone may not solve a garment that is under the same strain whenever you sit.
When restitching an opened seam is plausible
For a plain woven seam with intact fabric and usable allowance, a repairer can examine the original stitching path and rebuild the missing section. The Threads guide to simple mending describes restoring split seams with suitable machine stitches or hand backstitches, extending into intact stitching. Its example reinforces the distinction between resewing a seam and repairing missing cloth.
Before attempting that work, identify any lining or pocket bag that should remain separate. Sewing through every layer indiscriminately can close a pocket or attach the lining incorrectly. A seam near a fly, waistband or pocket opening may be more involved than an accessible straight section of leg.
Practice the chosen stitch on a suitable sample when possible, and avoid pulling the repair so tightly that it puckers the surrounding fabric. Afterward, inspect the outside alignment and try the garment cautiously. A repaired seam should not be treated as proof that the fit issue, if there was one, has disappeared.
A fabric tear is a different project
Where threads are missing or the cloth has split outside a seam, simply pulling the two edges together may change the shape or create a ridge. Consider whether a patch, backing or another mending method would produce a more useful result. The best option depends on the tear's location, the cloth and how discreet the finish needs to be.
Linen clothing maker Pyne & Smith's linen-repair guide demonstrates supporting a damaged area with a fabric patch and securing it with stitching. Its examples embrace visible mending. They support patching as an option, not a guarantee that a repaired trouser will look untouched or perform like new.
If you want a discreet result in a prominent front thigh or seat area, consult a repair specialist before trying a method that changes the surface. Repeated unsuccessful stitching, adhesive residue or aggressive trimming can make a later professional repair harder to plan.
Choose the visible result before choosing the thread
Decide whether the trousers must return to a formal wardrobe role or can become a casual pair with an intentional repair. A contrasting patch may be welcome on relaxed weekend pants and unsuitable for the outfit you planned for a ceremony. The garment's future use should guide the appearance you accept.
For a less conspicuous patch, compare color, texture and weight, not just a rough shade match. An old garment may no longer match new fabric with the same color name. A very stiff patch inside soft cloth can also change the feel and drape even if the color is close.
For visible mending, make the placement and shape deliberate. You might prefer a balanced patch outline or a clearly contrasting thread rather than a small irregular repair that looks unfinished. These are aesthetic choices, not requirements for successful mending. Ask to see relevant examples of a repairer's work if appearance is the deciding factor.
Location determines how practical the repair will feel
A patch near a lower leg may be easy to accept visually and during wear. The same thickness at the inner thigh or seat can be more noticeable while moving or sitting. Consider the edges, backing and stitching from the inside, not only the appearance of the outside photograph.
A pocket opening deserves attention because it is repeatedly used and may carry weight. If the surrounding fabric is damaged, attaching the pocket back to a weak edge may be insufficient. Discuss reinforcement and whether you should change what you carry there after repair.
Damage at a hem can sometimes be addressed through shortening, but only if the new length still works and enough sound fabric remains for the finish. Our hemming guide owns that alteration. Do not cut above a damaged edge until you have checked the complete new silhouette.
Use replacement listings to compare construction, not condemn brands
If repair is impractical, record what you would change in the next pair. Did you need more thigh room, a different pocket arrangement or a hem that cleared the ground? A replacement search becomes more useful when it responds to that concrete issue instead of treating one damaged garment as evidence that an entire brand is poor.
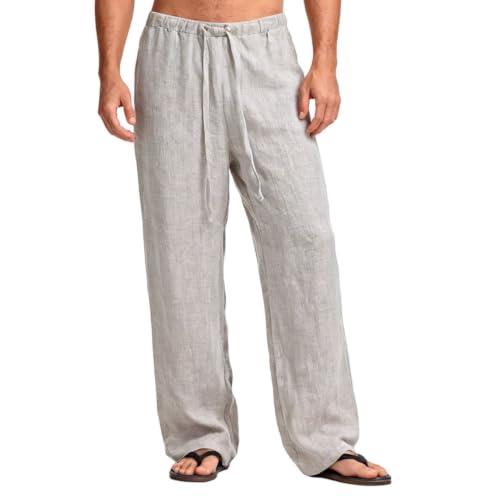
Amazhiyu's men's 100% linen loose drawstring listing offers a relaxed construction to compare if a previous close-fitting pair was unsuitable for your movement. Its title does not prove stronger seams or longer life. Faleave's women's cotton-linen palazzo listing provides a wide-leg alternative, but the blend wording likewise cannot establish resistance to the same damage.
Those examples are options for a future comparison, not a reason to replace a repairable pair. Our construction quality guide explains what to inspect on a new garment without assigning unsupported durability scores.
Know the limits of adhesive shortcuts
A product marketed as a repair adhesive or iron-on patch needs to be compatible with the actual cloth and care instructions. It may change texture or appearance, and heat application is not suitable by default for every linen blend, lining or trim. We have not verified a particular adhesive system for these pants.
If you consider one, read its manufacturer directions and test on an appropriate inconspicuous area or comparable material before relying on it. Do not substitute household glue simply because it is nearby. When appearance matters or the damaged area carries substantial strain, professional assessment can be the more controlled choice.
For an important event or everyday wardrobe essential, allow time to inspect the completed repair. Avoid making the first full wear the occasion on which a failure would be most disruptive. Keep a different usable garment available while you find out whether the repair meets your needs.
FAQs
Can I sew a linen tear closed without a patch?
Some narrow damage may suit a specific stitching repair, but closing the edges is not appropriate for every hole. Missing fabric, weakened surrounding cloth or distortion when the edges meet can call for support or another method. Decide after inspecting both sides rather than assuming the smallest visible fix is best.
Will a repaired seat seam be as strong as the original?
We cannot promise that. The fabric condition, repair method and strain during wear all matter. If the seat was too tight or the cloth is worn, restitching alone may not resolve the cause. Have the fit and surrounding fabric assessed along with the broken seam.
Should I cut away frayed linen before taking it to a repairer?
Avoid removing useful material before the repair is planned. Loose sewing-thread ends and damaged garment threads are not the same thing. Leave the area available for inspection and ask the repairer what should be trimmed; unnecessary cutting can enlarge the work.
When is it reasonable to stop repairing linen pants?
Consider replacement or a different use when damage is widespread, the repaired area would be uncomfortable, or the proposed result no longer serves the garment’s purpose. Compare the actual repair plan and cost with how you would use the pants afterward, rather than applying a universal rule based on age or original price.
Final Verdict
Repair begins with a diagnosis: broken stitches, torn cloth or broader wear. Restore an opened seam only when its fabric can support the work; consider a patch or specialist method when the cloth itself is damaged. Choose the finished appearance and future use deliberately, and let a practical, wearable result matter more than an unrealistic promise of invisible restoration.
Explore the relevant collections
Continue reading
- Linen Slubs, Snags and Pilling: What Is Normal?
- How to Judge Linen Pants Quality
- How to Hem Linen Pants
- How Linen Pants Should Fit: A First Try-On Diagnosis